×
- Hello
- Login or Register
- Quick Links
- Live Chat
- Track Order
- Parts Availability
- RMA
- Help Center
- Contact Us
- Shop for
- Lexus Parts
- Lexus Accessories
My Garage
My Account
Cart
This part fits
2008 Lexus IS250
Check another vehicle- Production Date: 08/2005-08/2010
- Fitting Vehicle Options: GSE25; GSE2#; GSE20
Lexus 12157-10010 Rear Differential Filler Plug Gasket
1990-2025 Lexus 1215710010
Customer Questions & Expert Answers (3)
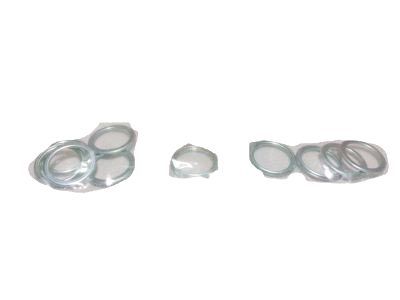

- Part DescriptionGasket, Drain Plug ; Gasket (For Rear Differential Filler Plug)
- SPORT PACKAGE
- PositionRear
- ManufacturerLexus
This part fits
2008 Lexus IS250
Check another vehicle- Production Date: 08/2005-08/2010
- Fitting Vehicle Options: GSE25; GSE2#; GSE20
$2.01 MSRP: $2.64
You Save: $0.63 (24%)
Ships in 1 Business Day
10
- Related Parts
- Specifications
- Q&A
Product Specifications
Brand Genuine Lexus Manufacturer Part Number 12157-10010 Part Description Gasket, Drain Plug ; Gasket (For Rear Differential Filler Plug) Item Dimensions 1.1 x 1.0 x 1.1 inches Item Weight 0.60 Pounds Position Rear Condition New Fitment Type Direct Replacement Manufacturer Lexus SKU 12157-10010 Warranty This genuine Lexus part is guaranteed by Lexus's factory warranty. Shipping & Return Shipping Policy Return Policy Warning: California's Proposition 65Customer Questions & Expert Answers
- Q:I just want to confirm that this is the part I need to replace. Posted by LexusPartsNow Specialist
- A:You can Select Your Vehicle to check if 12157-10010 fits your vehicle.Posted by LexusPartsNow Specialist
- Installation and Repair Tips by AI Expert
- Removal steps 1. Park on a level surface, engage parking brake, chock wheels, and wear eye protection and gloves. 2. Raise and support the vehicle with jack stands if needed to access the drain area; never rely on a jack alone. 3. Allow the engine and oil to cool enough to avoid burns. 4. If you want added safety against accidental starts or if working near electrical components, disconnect the negative battery terminal. 5. Position an oil drain pan under the drain plug, then loosen the drain plug slowly to control oil flow; remove the plug and let the oil drain. 6. Remove the old drain plug washer from the plug or oil pan mating surface; inspect for damage, debris, or metal particles. 7. Clean the mating surfaces on the plug and pan with a clean rag; ensure threads are free of old sealant or contaminants. Installation steps 1. Select the correct replacement washer type and size for your drain plug (commonly crush-type or bonded washers). 2. Place the new washer onto the drain plug seating surface so it will sit flush when installed. 3. Thread the drain plug into the pan by hand to avoid cross-threading, then snug it with a wrench until the washer is compressed and the plug is seated. 4. Do not overtighten; final tightening varies by design-use manufacturer torque if available or tighten only until the washer is properly compressed and no leaks occur. 5. Refill the engine with the correct oil and level, then reconnect the negative battery terminal if you disconnected it. 6. Start the engine, let it run briefly, and check the drain plug area for leaks; recheck oil level and retighten slightly if a leak is observed after shutdown. 7. Properly dispose of used oil and old washer, and lower the vehicle from the stands. Repair tip: Replace the washer every time the drain plug is removed; if the washer is a reusable metal type, inspect for warping or corrosion and replace if any defect is present.
- Q:Why are there 10 Rear Differential Filler Plug Gaskets pictured for this item but I only received 1? Amazon is selling the same item for the same price after shipping ($9) for all 10. This is somewhat deceiving of you guys and I'm quite disappointed considering the price it is and what I paid. This part number is for (1) order of Toyota OEM Part# 12157-10010 which is (10) gaskets. Posted by Customer: 2007 Lexus IS250 or IS350
- A:THEY ARE SOLD AS SINGLESPosted by LexusPartsNow Specialist 1/8/2022
- Q:
Why choose Lexus Parts Now
- Dedicated Service
Your complete satisfaction is our #1 goal
- Lowest Prices
Best deals on genuine OE parts from dealerships
- Fast Delivery
Orders are processed and delivered promptly