×
- Hello
- Login or Register
- Quick Links
- Live Chat
- Track Order
- Parts Availability
- RMA
- Help Center
- Contact Us
- Shop for
- Lexus Parts
- Lexus Accessories


My Garage
My Account
Cart
This part fits
1997 Lexus LX450
Check another vehicle- The location this part fits: Passenger Side
- Production Date: 11/1995-01/1998
- Fitting Vehicle Options: FZJ80
Lexus 81551-60320 Lens, Rear Combination Lamp, RH
1996-1998 Lexus LX450 8155160320
Customer Questions & Expert Answers (1)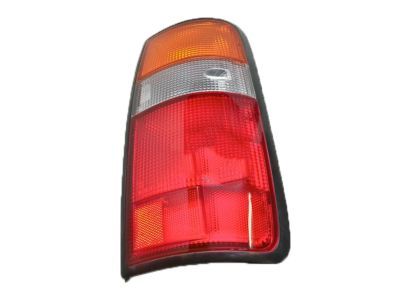
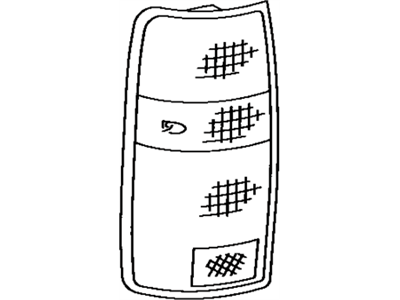
- Part DescriptionLens, Rear Combination Lamp, RH
- Part Name Code81551
- PositionPassenger Side
- ManufacturerLexus
This part fits
1997 Lexus LX450
Check another vehicle- The location this part fits: Passenger Side
- Production Date: 11/1995-01/1998
- Fitting Vehicle Options: FZJ80
$106.26 MSRP: $143.70
You Save: $37.44 (27%)
Ships in 1-3 Business Days
1
- Related Parts
- Specifications
- Q&A
Product Specifications
Brand Genuine Lexus Part Name Code 81551 Manufacturer Part Number 81551-60320 Part Description Lens, Rear Combination Lamp, RH Other Names Lens Item Weight 2.00 Pounds Position Passenger Side Condition New Fitment Type Direct Replacement Manufacturer Lexus SKU 81551-60320 Warranty This genuine Lexus part is guaranteed by Lexus's factory warranty. Shipping & Return Shipping Policy Return Policy Warning: California's Proposition 65Customer Questions & Expert Answers
- Installation & Repair Tips by AI Expert
- Removal steps 1. Park vehicle on level ground, engage parking brake, shift to park (or neutral with wheels chocked) and wear safety glasses and gloves. 2. Disconnect the negative battery cable to isolate the circuit and prevent shorting; wait a minute for systems to power down. 3. Gain access to the rear lamp area by removing or shifting interior trim or exterior lens fasteners as needed; trim/fastener types vary by design, so use appropriate trim tools. 4. If the back-up lamp is in a removable lamp assembly, loosen and remove the assembly fasteners as required to expose the bulb/socket; specific fastener locations differ by vehicle. 5. Unplug the lamp electrical connector from the socket; examine connector for corrosion or damage before proceeding. 6. Remove the bulb from its socket by the appropriate release method (twist, pull, or unclip) used by that lamp design; discard any broken bulb pieces safely. 7. Inspect the socket and wiring for corrosion, melting, or loose terminals and address any damage before installing a new bulb. Installation steps 1. Confirm replacement bulb is the correct type and handle it with gloves or a clean cloth to avoid oil on the glass; do not touch the glass with bare fingers. 2. Install the new bulb into the socket in the same orientation and by the same method it was removed (twist, push, or clip) until it seats securely. 3. Reconnect the lamp electrical connector and ensure it locks in place and that wiring is routed away from pinch points and heat sources. 4. Temporarily reconnect the negative battery cable and test the back-up light by placing the transmission in reverse (engine off or with brake applied as appropriate); if practical, have an assistant verify illumination. 5. If the lamp functions, disconnect the battery again (if you need to finish reassembly with battery isolated), then reinstall the lamp assembly and any trim panels or fasteners you removed, ensuring proper fit and sealing. 6. Reconnect the negative battery cable if it was disconnected, recheck lamp operation, and verify there are no warning lights on the dash related to the repair. 7. Final inspection: confirm fasteners are snug, wiring is secure, lens is clean, and apply a small amount of dielectric grease to the connector terminals if available to help prevent corrosion. Repair tip: If the new bulb fails quickly or the socket shows corrosion, replace the socket or connector pigtail rather than repeatedly replacing bulbs.