×
- Hello
- Login or Register
- Quick Links
- Live Chat
- Track Order
- Parts Availability
- RMA
- Help Center
- Contact Us
- Shop for
- Lexus Parts
- Lexus Accessories


My Garage
My Account
Cart
This part fits
2001 Lexus GS300
Check another vehicle- The location this part fits: Rear
- Production Date: 02/2000-08/2002
- Fitting Vehicle Options: JZS160, UZS16#
Lexus 04466-30161 Rear Disc Brake Pad Kit
1998-2003 Lexus 0446630161
Customer Questions & Expert Answers (1)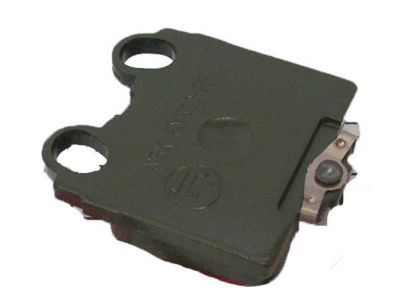
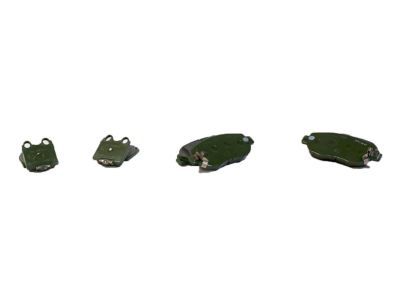
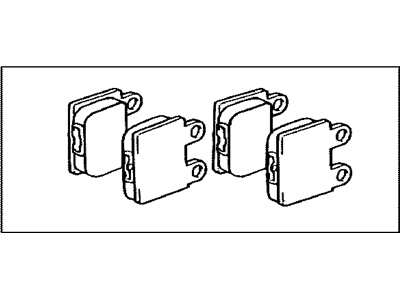
- Part DescriptionPad Kit, Disc Brake, Rear
- MARK NBK PN529
- Part Name Code04466
- PositionRear
- Replaces
- ManufacturerLexus
This part fits
2001 Lexus GS300
Check another vehicle- The location this part fits: Rear
- Production Date: 02/2000-08/2002
- Fitting Vehicle Options: JZS160, UZS16#
$62.35 MSRP: $83.00
You Save: $20.65 (25%)
Ships in 1-3 Business Days
1
- Related Parts
- Specifications
- Q&A
Product Specifications
Brand Genuine Lexus Part Name Code 04466 Manufacturer Part Number 04466-30161 Part Description Pad Kit, Disc Brake, Rear Other Names Brake Pads, Rear Pads Manufacturer Note MARK NBK PN529 Item Weight 2.50 Pounds Position Rear Condition New Fitment Type Direct Replacement Replaces 04466-30130, 04466-30160, 04466-30110 Manufacturer Lexus SKU 04466-30161 Warranty This genuine Lexus part is guaranteed by Lexus's factory warranty. Shipping & Return Shipping Policy Return Policy Warning: California's Proposition 65Customer Questions & Expert Answers
- Installation & Repair Tips by AI Expert
- Removal steps 1. Park on a level surface, engage the parking brake, chock the opposite wheels, and wear eye protection and gloves. 2. Break wheel lug nut snugness while the vehicle is on the ground. 3. Safely raise the vehicle and support it on quality jack stands placed at manufacturer-recommended support points. 4. Remove the wheel to access the brake assembly. 5. Disconnect the negative battery cable to protect any pad-wear sensors or electronic components before handling wiring. 6. If the vehicle has an electronic parking brake or built-in actuators, follow the manufacturer procedure to release/disable it before removing the caliper. 7. Support the caliper with a caliper hanger or strap; do not let it hang from the brake hose. 8. Remove the caliper mounting hardware (note orientation and retain fasteners) and move the caliper off the rotor enough to access the pads. 9. Remove the old pads and any retaining clips, shims, or anti-rattle hardware, noting their positions for reassembly. 10. Inspect the rotor surface, caliper body, slide pins, brake hose, and pad wear sensor wiring for damage or excessive wear. 11. If brake fluid rises in the reservoir when compressing pistons, remove excess fluid with an appropriate tool; avoid overflowing the reservoir. 12. Clean pad mounting points and set the old parts aside for disposal or recycling. Installation steps 1. Clean mating surfaces and lightly lubricate pad backing contact points and caliper slide pins with high-temperature brake grease; keep grease off friction surfaces. 2. Transfer or replace any shims, clips, or hardware with new components as needed and install new pads in the same orientation as removed. 3. Retract the caliper piston(s) using an appropriate tool or spreader; piston design varies so use the correct method and stop if excessive resistance is felt. 4. Position the caliper over the new pads and rotor, reinstall the caliper mounting hardware, and ensure clips and retainers are properly seated. 5. Reconnect any pad-wear sensor or caliper wiring and secure harnesses away from moving parts. 6. If you disconnected the battery, reconnect the negative battery cable now. 7. Reinstall the wheel, lower the vehicle to the ground, and tighten lug nuts in a cross/star sequence to the vehicle manufacturer's specification. 8. Gently pump the brake pedal several times with the engine off until a firm pedal is achieved to seat the pads and restore hydraulic pressure. 9. Check the brake fluid level and inspect for leaks, then perform a cautious low-speed test drive with moderate stops to confirm function and bedding-in. 10. Repair tip: avoid contaminating pad surfaces with grease or oil; if rotors show heavy scoring or runout, have them measured and resurfaced or replaced as recommended.
Why choose Lexus Parts Now
- Dedicated Service
Your complete satisfaction is our #1 goal
- Lowest Prices
Best deals on genuine OE parts from dealerships
- Fast Delivery
Orders are processed and delivered promptly