My Garage
Cart
Make sure this part fits

Lexus 86160-0W560 Front Speaker Assembly No.1

2003-2010 Lexus 861600W560

Customer Questions & Expert Answers (4)
86160-0W560 Lexus Front Speaker Assembly No.1 Product Photo 1 of 6
  • Part Description
    Speaker Assy, Front NO.1
  • Part Name Code
    86160
  • Position
    Front
  • Manufacturer
    Lexus
Make sure this part fits
$220.81 MSRP: $291.78
You Save: $70.97 (25%)
Ships in 1-2 Business Days
1
ADD TO CART
  • Related Parts
  • Product Specifications
  • Vehicle Fitment
  • Customer Questions & Expert Answers
  • Product Specifications

    BrandGenuine Lexus
    Part Name Code86160
    Manufacturer Part Number86160-0W560
    Part DescriptionSpeaker Assy, Front NO.1
    Other NamesFront Door Speaker, Speaker, Woofer
    Item Dimensions15.5 x 11.4 x 8.1 inches
    Item Weight3.10 Pounds
    PositionFront
    ConditionNew
    Fitment TypeDirect Replacement
    Require Quantity2
    ManufacturerLexus
    SKU86160-0W560
    WarrantyThis genuine Lexus part is guaranteed by Lexus's factory warranty.
    Shipping & ReturnShipping Policy Return Policy
    Warning: California's Proposition 65
  • Vehicle Fitment

    Year Make Model Trim & Engine Important vehicle option details
    2007-2010 Lexus ES3506 Cyl 3.5L2GRFE; GSV40L-BETGKA
    2003-2009 Lexus GX4708 Cyl 4.7L2UZFE; UZJ120L-GKAZKA
    2004-2006 Lexus RX330STD|6 Cyl 3.3L, 6 Cyl 3.5L2GRFE, 3MZFE; GSU30L-AWAGKA, GSU30L-CWAGKA, GSU35L-AWAGKA, GSU35L-CWAGKA, MCU33L-AWAGKA, MCU33L-CWAGKA, MCU38L-AWAGKA, MCU38L-CWAGKA
    2007-2009 Lexus RX350STD|6 Cyl 3.3L, 6 Cyl 3.5L2GRFE, 3MZFE; GSU30L-AWAGKA, GSU30L-CWAGKA, GSU35L-AWAGKA, GSU35L-CWAGKA, MCU33L-AWAGKA, MCU33L-CWAGKA, MCU38L-AWAGKA, MCU38L-CWAGKA
    2006-2008 Lexus RX400hSTD|6 Cyl 3.3L3MZFE; MHU33L-AWXGKA, MHU38L-AWXGKA
  • Customer Questions & Expert Answers

    Q:
    I am trying to confirm fitment Posted by LexusPartsNow Specialist
    A:
    You can Select Your Vehicle to check if 86160-0W560 fits your vehicle.
    Posted by LexusPartsNow Specialist
    Q:
    How to remove and install the front and rear Car Speakers and the radio/navigation unit on Lexus ES350? Posted by Customer
    A:
    Take the connector away from where it connects to the negative battery terminal. On ES350 vehicles, use a trim tool to pry up the radio's center panel above the stereo. Take off the screws that hold the radio in, slide the unit forward to get to its back, disconnect all electrical wiring and antenna connection. First, remove all the hardware that holds the radio/navigation unit in place. Then, unfasten and lift away the radio unit from the heater and A/C control panel assembly, and pull apart the radio and navigation units. Installation is the reverse of removal. Unscrew the trim panel from the door. Then remove mounting screws, taking the speaker out. Pull out the electrical plug, then detach the speaker from the car. Installation is the reverse of removal. With a trim tool, slowy pry off the speaker covers one by one, then take out the mounting screws, and pull the speaker upwards. Pull the electrical connection apart, then take the speaker out of its position on the dashboard. Installation is the reverse of removal. Lift up both rear seat cushions. After that, take out the back trunk panel. Turn screws to unscrew the speaker, lift it out, disconnect its electrical plug, and take the speaker off the shelf. Installation is the reverse of removal.
    Posted by LexusPartsNow Specialist
    Q:
    How to remove and install the car speakers on the Lexus RX330? Posted by Customer
    A:
    To replace the radio in 2013 Highlander and 2009 Lexus models, detach the center trim panel first, then unscrew the mounting bolts from the radio moldings, sliding out the four-switch panel far enough to disconnect the wires. Separate the two parts in this section - first unhook all electric wires from each piece. To take off the radio unit from its bracket, unscrew the bolts at each end of the mounting place. Installation is the reverse of removal. Every model has the same process for door speakers: open the trim panel, detach the electrical plug, loosen the mounting screws, and take out the speaker; reversing those steps puts it back. When you take out a front-door tweeter, first remove the door trim, disconnect the electric wire, unscrew the bolt, and pull the speaker free. Installing it is just the reverse. To remove speakers from your panel, start by unlocking and lifting the attachment clamps on the hood. Disconnect the electrical connection and remove any fasteners holding it, then lift the speakers off. Reassembling is done in the opposite order. To remove and replace quarter trim panel speakers, first take off the quarter trim panels, disconnect the wiring, remove any screws, and detach the speakers - reinstallation goes in the opposite order. To uninstall the lift gate speaker, pull off the panel, disconnect its electrical connector, remove the mounting screws, and take out the speaker, leaving the cone alone. Reversing these steps puts the speaker back in place. In Highlander models with overhead video, you can use a plastic tool to lift up the corners of the trim panel, then pull out the display unit by disconnecting its electrical connector, taking off its fasteners, and gently pulling it down through the roof. To reach the Lexus seat back video monitor, first raise the video screen. Then, use a plastic trim tool to push the lower edge of the trim panel outwards until the small clamps let go. Pull down the panel, remove it, drop the video unit down, disconnect the connection wires, and pull the unit out from the back of the seat. Reversing these steps puts everything back in place.
    Posted by LexusPartsNow Specialist
    Q:
    How to remove and install the car speakers on the Lexus RX350? Posted by Customer
    A:
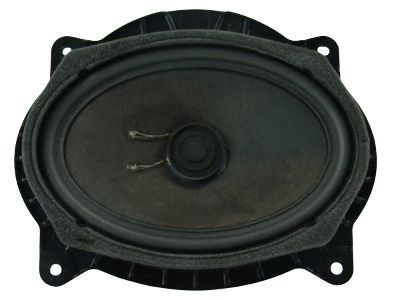
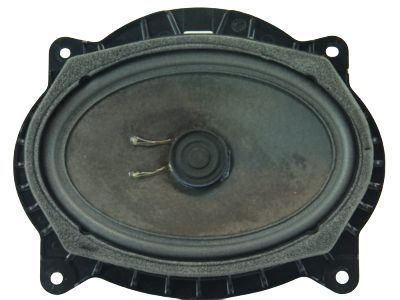
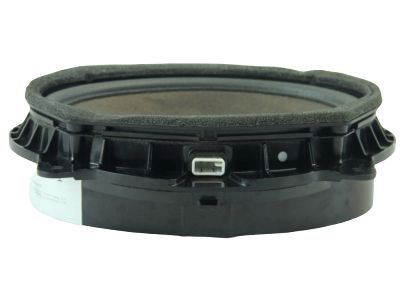
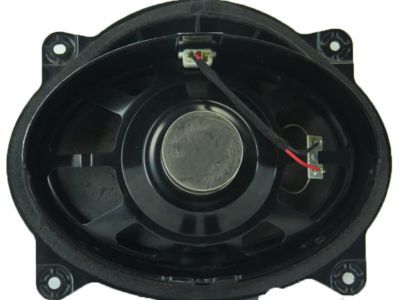
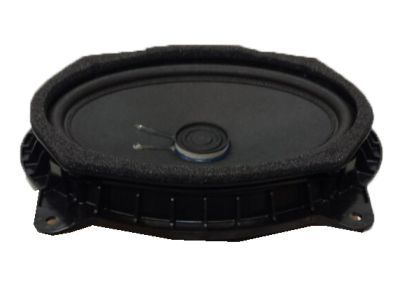
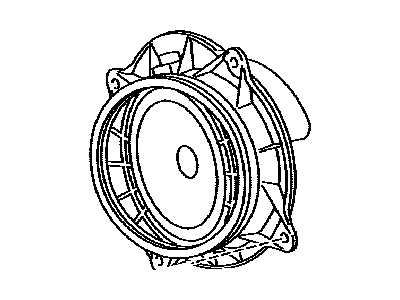
    To remove the radio from 2013 and earlier Highlander and 2009 and earlier Lexus models, start by removing the center trim panel, then take out the radio and heater/air conditioning control assembly mounting bolts, pulling out the cluster enough to disconnect the electrical connectors. Next, pull out the radio and heater/air conditioning control assembly, disconnecting the electrical connectors, and detach the radio unit from the mounting bracket by removing the bolts from each end. For installation, reverse the removal steps. For 2014 and later Highlander models, disconnect the negative battery cable, remove the center upper trim panel and two center air registers, then take out the radio unit fasteners, noting that two fasteners are located behind the radio unit in the air register openings. Pull the radio unit and bracket forward to release the retaining clip and disconnect the electrical connectors, then remove the fasteners and lower the display unit from the roof, with installation being the reverse of removal. For 2010 through 2015 Lexus models, disconnect the negative battery cable, remove the shift lever, carefully pry up the center console top panel, remove the knee bolster panel, and disconnect the switches. Remove the two lower center trim panels from under the radio assembly, take out the radio unit fasteners, and carefully pry the radio and air conditioning panel out from the instrument panel, disconnecting the electrical connectors. Note that the radio assembly cannot be removed from the trim panel, and if replacing the radio unit, remove the air registers and hazard switch. Installation is the reverse of removal. For 2016 and later Lexus models, disconnect the negative battery cable, remove the two top trim panels from the edges of the floor console, and carefully pry out the narrow center trim panels. Locate and remove the vertical radio assembly fasteners, pull the radio unit and bracket forward to release the retaining clip, and disconnect the electrical connectors. Installation is the reverse of removal. For door speakers, remove the door trim panel, disconnect the electrical connector, remove the speaker mounting screws, and take out the speaker, with installation being the reverse. For tweeters located in the front doors, follow a similar process. For instrument panel speakers, carefully pry the speaker cover panel(s) up, disconnect the electrical connector, remove the fasteners, and detach the speaker. For quarter trim panel speakers, remove the quarter trim panels, disconnect the electrical connector, and detach the speaker. For the lift gate speaker, remove the lift gate panel, disconnect the electrical connector, and detach the speaker, ensuring not to touch the speaker cone. For the overhead video display unit in Highlander models, use a plastic trim tool to pry the corners of the trim panel, disconnect the electrical connector, and lower the display unit. For seat back video display units in Lexus models, raise the video monitor, pry the lower edge of the cover trim panel, remove the fasteners, disconnect the electrical connector, and remove the unit from the seat back, with installation being the reverse of removal.
    Posted by LexusPartsNow Specialist
    If you have any questions about this product, please don't hesitate to ask us. We will be happy to help you!

Genuine Lexus Part 86160-0W560, the Right Choice

Getting part # 86160-0W560 Front Speaker Assembly No.1 helps restore factory performance. It is also referred to as Car Speakers. This part works with 2007-2010 ES350, 2003-2009 GX470, 2007-2009 RX350, 2006-2008 RX400h. Purchasing OEM parts for your vehicle should be your top priority. Manufactured by Lexus, they are built to meet high standards and utilize only top-notch materials for decent reliability and durability.

LexusPartsNow.com offers dependable parts and accessories including 861600W560 Front Speaker Assembly No.1. Visit our website for the most preferential OEM parts online. Each part is backed by the OEM manufacturer warranty, confirming its high level of quality. We deliver all our parts fast and they come with a straightforward return policy.

Why choose Lexus Parts Now

  • Dedicated Service

    Your complete satisfaction is our #1 goal

  • Lowest Prices

    Best deals on genuine OE parts from dealerships

  • Fast Delivery

    Orders are processed and delivered promptly